Difference between revisions of "Hisense Pulse"
(Added notes about pulse modification package.) |
(→Links) |
||
| Line 89: | Line 89: | ||
== Links == | == Links == | ||
[http://www.amazon.com/gp/product/B009VXUFLG/ Amazon Product Description] | [http://www.amazon.com/gp/product/B009VXUFLG/ref=as_li_ss_tl?ie=UTF8&tag=gtvcom-20&linkCode=as2&camp=1789&creative=390957&creativeASIN=B009VXUFLG Amazon Product Description] | ||
Revision as of 02:49, 22 January 2013
"Although the information we release has been verified and shown to work to the best our knowledge, we cant be held accountable for bricked devices or roots gone wrong."
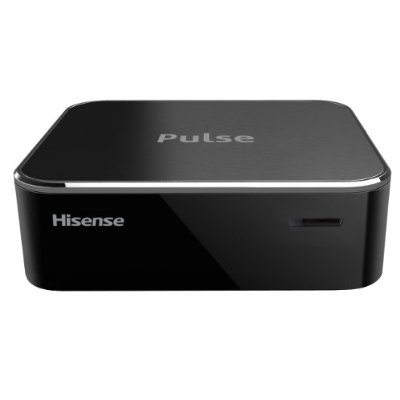
This page will be dedicated to the hardware specifications, descriptions, and information related to the Hisense Pulse (GX1200V).
Purchase
Buying Google TV devices is expensive and, in a lot of cases our testing leads to bricked equipment. If you would like to help support our group, site, and research please use one of the links below to purchase your next Google TV.
Purchase the Hisense Pulse at Amazon
Specs
- Marvell Armada 1500(88de3100)1 1.2 GHz dual-core processor, with a 750 MHz GPU2
- 1 GB DDR3 Memory
- 4 GB Flash NAND
- Single USB Port
- IR Blaster
Features
- Microphone is in remote, however it does not work yet (software update required -v3 Google TV?)
- Remote is IR / BT. IR in Recovery, BT in normal running mode, however will fall back to IR if the BT signal is lost.
Gallery
Connections / Connectors / Switches
- (SPI / JTAG)?
- XP25 - UART (115200 8n1)
- XP21 - Wifi
- USB
- SW1 - Reboot (not populated)
- SW2 - Factory Reset (recovery?)
UART Pinout
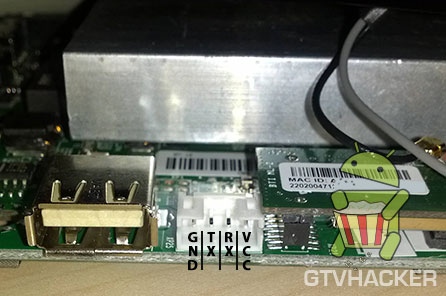
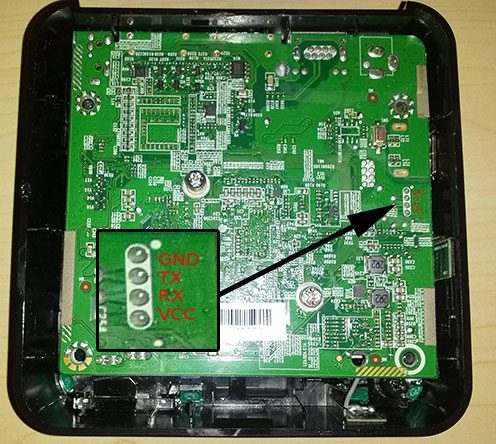
The Hisense Pulse features a serial output that can be accessed. In the initial software version, this dropped directly into a root shell.
Using a UART/TTL Adapter (3.3v), connect wire for wire to the pinout below. A connector is on the board, you can either route your wires out of the bottom of the box, or cut a small hole in the side (next to the USB port). Alternate points are also provided below (for soldering).
Settings are 115200 8n1, no login or password. You will be dropped to a root shell after bootup
Update History
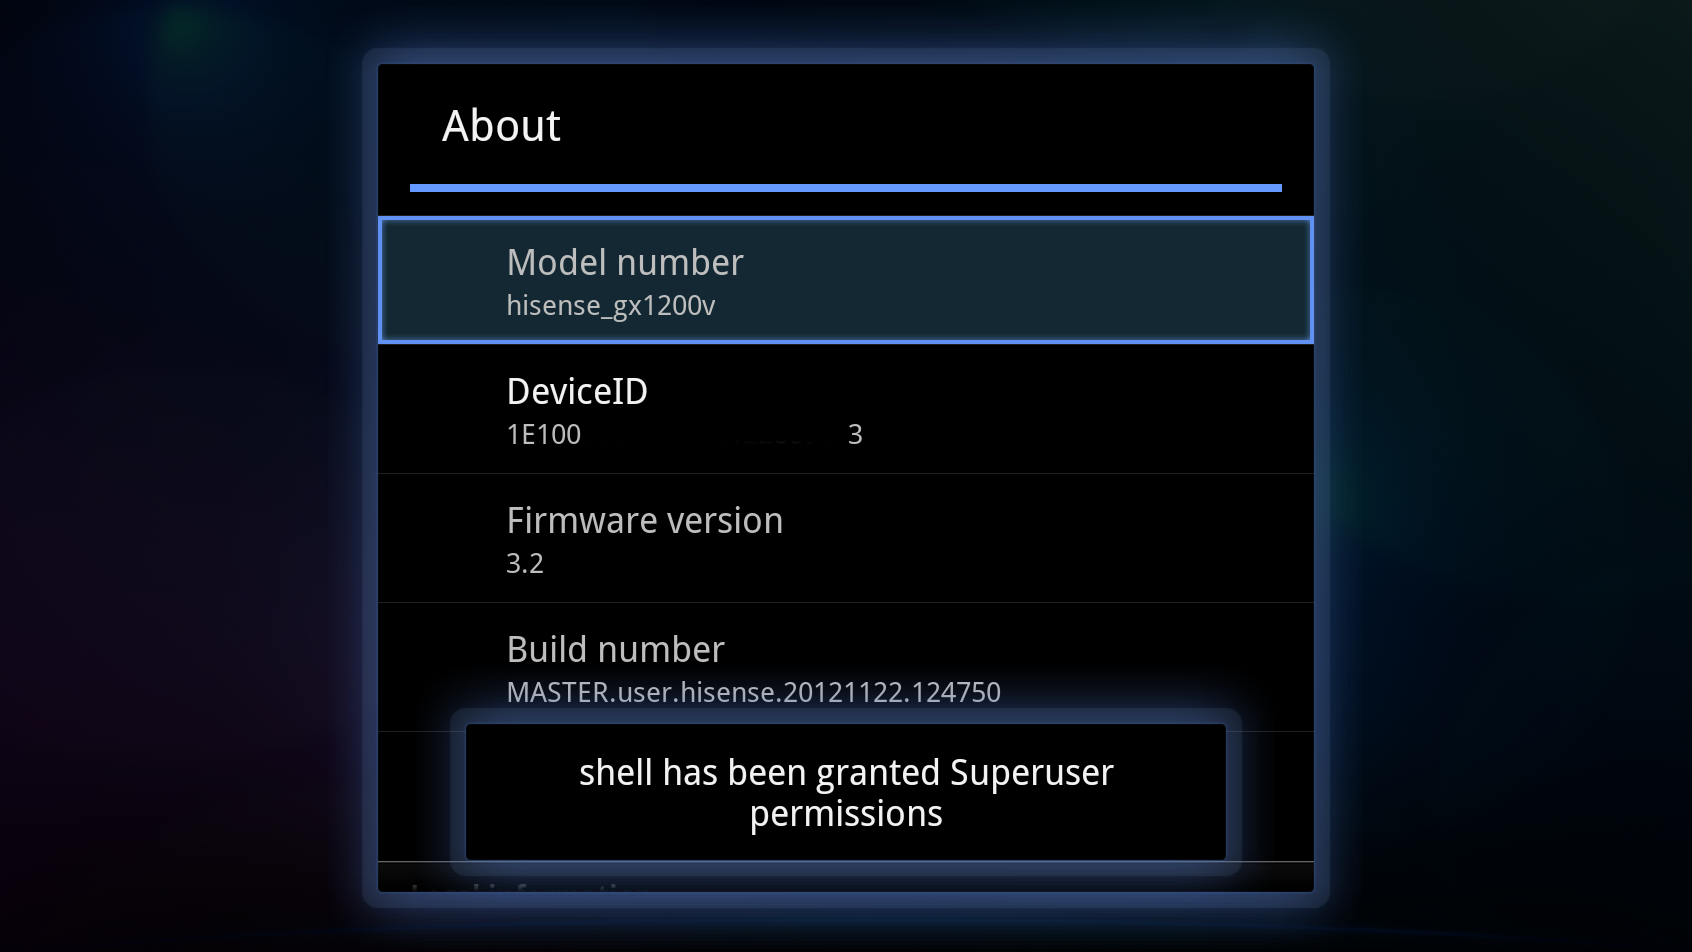
- MASTER.user.hisense.20121122.124750 (BOX_2.22a.C0920_E_release) - Launch version, shipped on the box
- MASTER.user.hisense.20121212.182643 (BOX_2.31a.C1204_E_release) - First OTA (12/31/2012). Removes root. Do not update to this. Download
Pulse Modification Package
| When the Hisense Pulse was released, it shipped mostly insecure with "ro.debuggable" being set to 1 which allowed adb to run as root. So to make utilizing this a bit easier we've created a package of the most sought after modifications and created an easy to use install script. This is currently patched by the first update received from the box after installation. If you would like to root your device, do not accept this update before performing the below steps.
Package features:
|
Instructions: The instructions below rely on you already having installed the android sdk and having easy access to adb
- adb connect <IP_OF_YOUR_GTV>
- adb root
- adb connect <IP_OF_YOUR_GTV>
- adb push location_of_pulse_root.sh /tmp/pulse_root.sh
- adb shell
- In the adb shell prompt, which should currently be displaying a "#" enter the following without quotes: "cd /tmp; sh pulse_root.sh"
- Reboot the device
- After the reboot follow the steps below to modify Chrome's User Agent.
Modifying Chromes User Agent
- Open Chrome on the Pulse
- Click the Menu button (Between Web and FN)
- Choose Settings
- Choose Advanced Settings
- Click on "Under the Hood" in the left panel
- Scroll down to the User Agent section and choose "Custom User Agent"
- You can choose "Generic User Agent" if you'd like but we recommend using "Custom User Agent" along with a legitimate PC User Agent such as those found at UserAgentString.com
- You're finished, restart the device and enjoy Fox/NBC/CBS/Hulu/Etc.
Download: Pulse Modification Script
MD5: e137a82a0e1e466b7aa5dbc21775d6f1 SHA1: c70db75e50673786b6bab15dfdd00a3caa072311


