Difference between revisions of "Amazon FireTV"
(Revised EMMC Pinout) |
m (Text replacement - "gtvcom-20" to "exploiteers-20") |
||
| (One intermediate revision by one other user not shown) | |||
| Line 7: | Line 7: | ||
== Purchase == | == Purchase == | ||
Buying devices is expensive and, in a lot of cases our testing leads to bricked equipment. If you would like to help support our group, site, and research please use one of the links below to purchase your next device. | Buying devices is expensive and, in a lot of cases our testing leads to bricked equipment. If you would like to help support our group, site, and research please use one of the links below to purchase your next device. | ||
[http://www.amazon.com/gp/product/B00CX5P8FC/ref=as_li_tl?ie=UTF8&camp=1789&creative=390957&creativeASIN=B00CX5P8FC&linkCode=as2&tag= | [http://www.amazon.com/gp/product/B00CX5P8FC/ref=as_li_tl?ie=UTF8&camp=1789&creative=390957&creativeASIN=B00CX5P8FC&linkCode=as2&tag=exploiteers-20&linkId=25I5UAPHAJOXM27U Purchase the FireTV at Amazon] | ||
== | == UART == | ||
UART output can be seen by attaching an adapter to the following UART points. | |||
<gallery> | <gallery> | ||
File:FireTV Uart Pinout.jpg | File:FireTV Uart Pinout.jpg | ||
</gallery> | </gallery> | ||
== | ==e-MMC HW Root== | ||
EMMC | The Amazon Fire TV utilizes an EMMC flash. Using the pinouts below and our special low voltage adapter, you can connect the flash to a SD card reader, and rewrite it's contents. | ||
For the FireTV device specifically, you can mount the /system partition, which is EXT4. From here, just copy over the SuperSU APK into app, and the su binary to bin. Ensure that you properly chown the su binary (4755). This will allow for root access via ADB. A video demonstrating the process can be found below. | |||
Information on interfacing with e-MMC flash devices can be found on our wiki at: [[Interfacing with e-MMC Storage Devices]] | |||
==e-MMC Pinout== | |||
In order to access the e-MMC flash device on the Fire TV, you will need to first open the device and remove the heat shield. A tear down of the device can be found in the video below which illustrates the process. Information on interfacing with the e-MMC points on the Fire TV can be found in the e-MMC HW Root section above. | |||
<gallery> | |||
File:FireTVEMMCPinout.png | |||
</gallery> | |||
==e-MMC HW Root Demo== | |||
{{#ev:youtube|IgC4iDzQ8gw}} | |||
Latest revision as of 01:22, 7 February 2016
"Although the information we release has been verified and shown to work to the best our knowledge, we cant be held accountable for bricked devices or roots gone wrong."
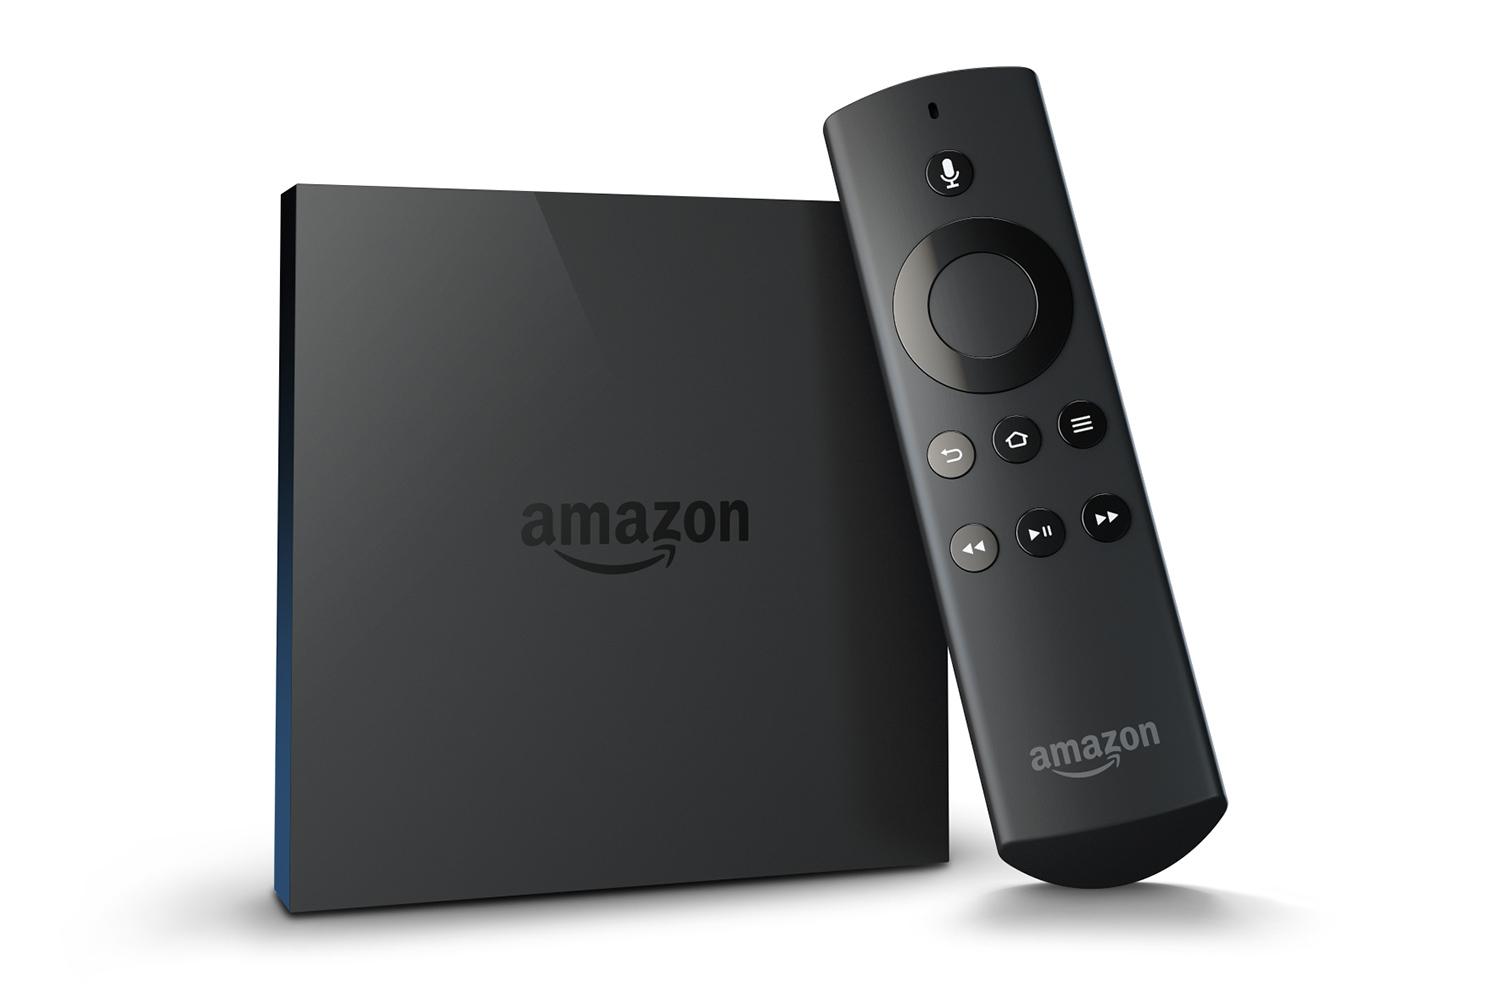
This page will be dedicated to a general overview, descriptions, and information related to the Amazon FireTV.
Purchase
Buying devices is expensive and, in a lot of cases our testing leads to bricked equipment. If you would like to help support our group, site, and research please use one of the links below to purchase your next device. Purchase the FireTV at Amazon
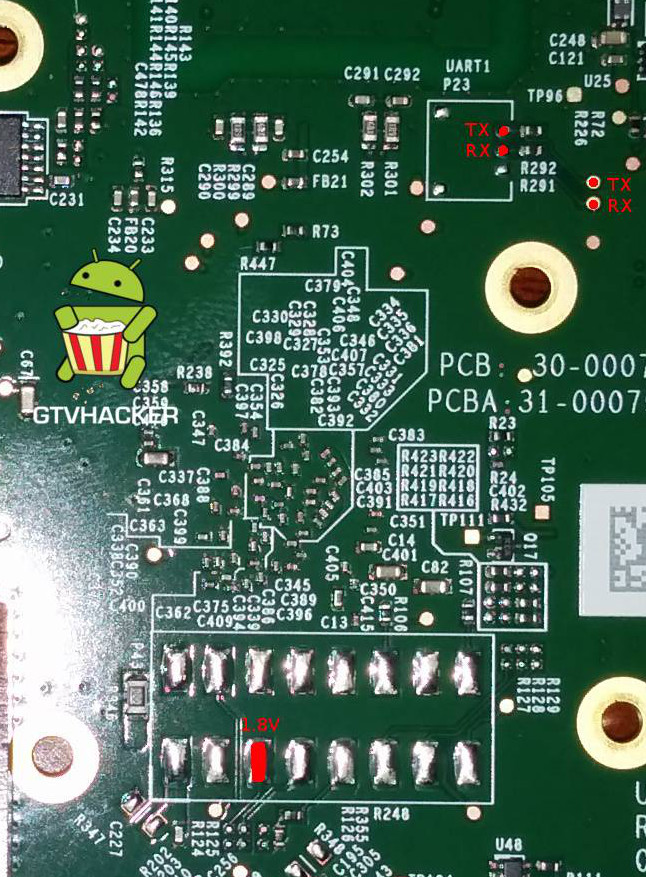
UART
UART output can be seen by attaching an adapter to the following UART points.
e-MMC HW Root
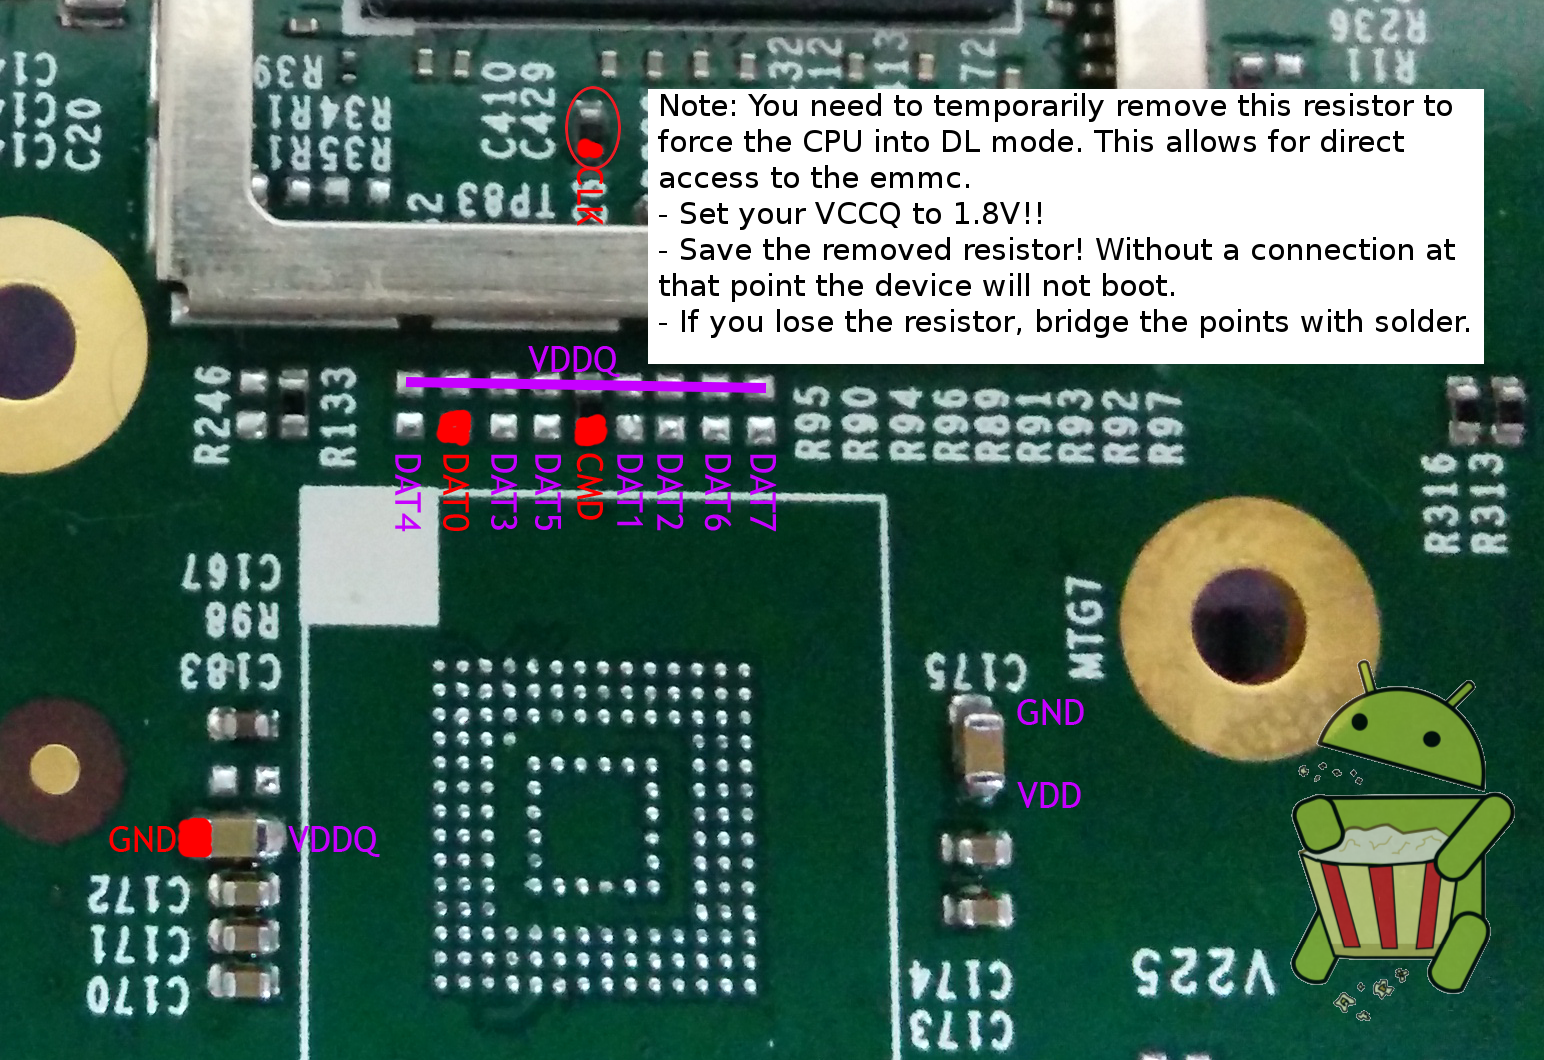
The Amazon Fire TV utilizes an EMMC flash. Using the pinouts below and our special low voltage adapter, you can connect the flash to a SD card reader, and rewrite it's contents.
For the FireTV device specifically, you can mount the /system partition, which is EXT4. From here, just copy over the SuperSU APK into app, and the su binary to bin. Ensure that you properly chown the su binary (4755). This will allow for root access via ADB. A video demonstrating the process can be found below.
Information on interfacing with e-MMC flash devices can be found on our wiki at: Interfacing with e-MMC Storage Devices
e-MMC Pinout
In order to access the e-MMC flash device on the Fire TV, you will need to first open the device and remove the heat shield. A tear down of the device can be found in the video below which illustrates the process. Information on interfacing with the e-MMC points on the Fire TV can be found in the e-MMC HW Root section above.


