Difference between revisions of "Sony NSZ-GT1 (Bluray Player)"
| (One intermediate revision by the same user not shown) | |||
| Line 5: | Line 5: | ||
== Specs == | == Specs == | ||
*Intel Atom CE4170 1.7 GHz processor, with a 200 MHz GPU<sup>1</sup> | * [[Intel Atom CE4170]] 1.7 GHz processor, with a 200 MHz GPU<sup>1</sup> | ||
== Tear Down == | == Tear Down == | ||
| Line 59: | Line 59: | ||
# http://www.windowsfordevices.com/c/a/News/Intel-CE4100/ | # http://www.windowsfordevices.com/c/a/News/Intel-CE4100/ | ||
# [http://esupport.sony.com/US/p/model-home.pl?mdl=NSZGT1&LOC=3 Sony NSZ-GT1 Support Site] | # [http://esupport.sony.com/US/p/model-home.pl?mdl=NSZGT1&LOC=3 Sony NSZ-GT1 Support Site] | ||
[[Category:Google TV]] | |||
Latest revision as of 21:42, 24 February 2015
"Although the information we release has been verified and shown to work to the best our knowledge, we cant be held accountable for bricked devices or roots gone wrong."
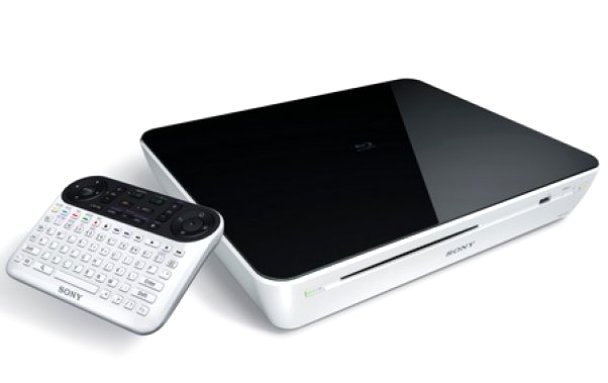
This page will be dedicated to the hardware specifications, descriptions, and information related to the Sony NSZ-GT1 (Bluray Player).
Specs
- Intel Atom CE4170 1.7 GHz processor, with a 200 MHz GPU1
Tear Down
Sony NSZ-GT1 Google TV Teardown
Recovery Mode
Apeman42 from XDA Developers found Recovery Menu
- Have everything plugged into the unit except the power coord. Have the power coord in your hand.
- Press and hold the power button and plug the unit in.
- Continue to hold down the power button for 3 seconds after plugging it in, then release the power button.
- Wait a couple of seconds and it will say Sony, then you will see the recovery screen.
- After it loads, press and hold the connect button on the unit. Then follow the directions at the bottom of the screen (Press and hold ALT+ENTER) for 8 seconds/until the bottom message changes. It will change back to it saying that you have to press the CONNECT button, but your remote IS connected.
- You can now press the numbers assigned to the commands!
USB Update
The steps to access recovery mode are listed in the "Recovery Menu" section above. Also, a list of OTA sony downloads can be found Here
In recovery mode, any USB storage device will be automounted when inserted. If it's inserted at the start of recovery mode, the device will attempt to do a USB update. This executes the following:
cmd:ls /tmp/mnt/diskb1/package_list_*.zip | head -1 | grep "package_list_"
cmd:/bin/sony/check_version.sh /tmp/mnt/diskb1/package_list_0.zip
For a USB update to succeed, the following are necessary (but not sufficient):
- there must be a file matching /package_list_*.zip or else you get the error "find package error: no such a package !"
- the zip must contain a file "system/build.prop" or else you get the error "caution: filename not matched: system/build.prop"
- the zip must contain a file matching "package_list_*.txt" or else you get the error "caution: filename not matched: package_list_*.txt"
- The system/build.prop must have an ro.build.id that is greater than the current values. Otherwise you get an onscreen message saying "USB data is old".
- At this point, the signature is checked:
package update start !
cmd:/package_update.sh -y -l 0 -p /tmp/mnt/diskb1/package_list_ogm_2.1_2011_asu1
(*) Direct/Interface: Loaded 'PNG' implementation of 'IDirectFBImageProvider'.
dtv_sym_tv_updating.png = w: 1920, h: 1080.
Verifying..
Error in main(47):Footer Error
Signing Verify Error
Error!!
If a valid-looking zipfile on a USB storage device is plugged in when the system goes through a normal boot, it will abort and reboot into the recovery mode.
Device Menus
Information can be found on the system menus at: Sony Settings Menus
Related
